Why TKMs?
Why do TKMs matter? TKMs are used in cost modeling. A good cost model will use TKM to calculate the cost of haulage. Let’s explore what a cost model would like like without TKMs.
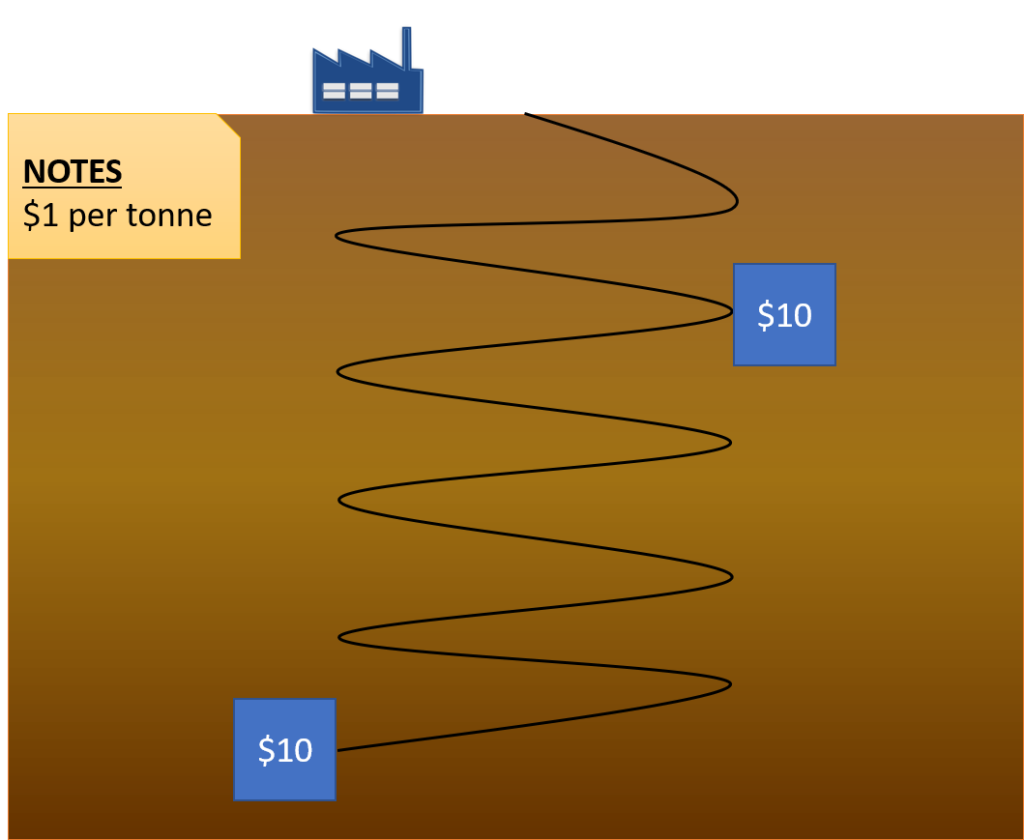
Example-A: Tonnes Only
In this example lets look at tonnes only and disregard distance. We have a mill on surface and we have a decline underground. The cost model assumes $1.00 for every ton. In our mine plan we have two zones (blue boxes). Zone-A has 10 tonnes and is located at the top of the mine. Zone-B has 10 tonnes and is located at the bottom of the mine. According to our model it will cost the same amount to haul each of these items to the mill. This is not logical because the material at the bottom of the mine should have a greater costs. You will spend more time and fuel getting the material from Zone-B to the mill.
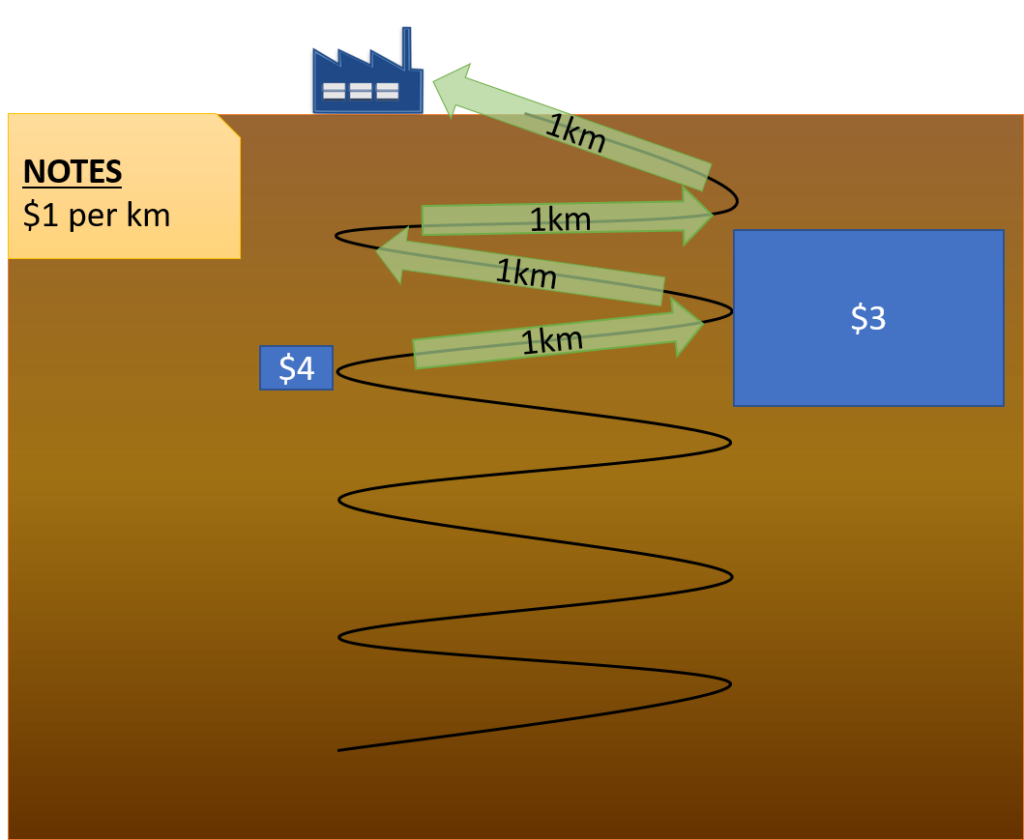
Example-B: Distance Only
In this example lets look at distance only and disregard tonnes. We have the same mill on surface and the same underground decline. The cost model assumes $1.00 for every kilometer hauled. In our mine plan we have two zones (blue boxes). Zone-A has 100 tonnes and is located 3 km from the mill. Zone-B has 5 tonnes and is located 4 km from the mill. Because we are disregarding the tonnes, it will cost $3.00 to haul the material in Zone-A and it will cost $4.00 to haul the material in Zone-B. This is not logical because we hauled significantly more tonnes from Zone-A and it costs less compared to Zone-B.
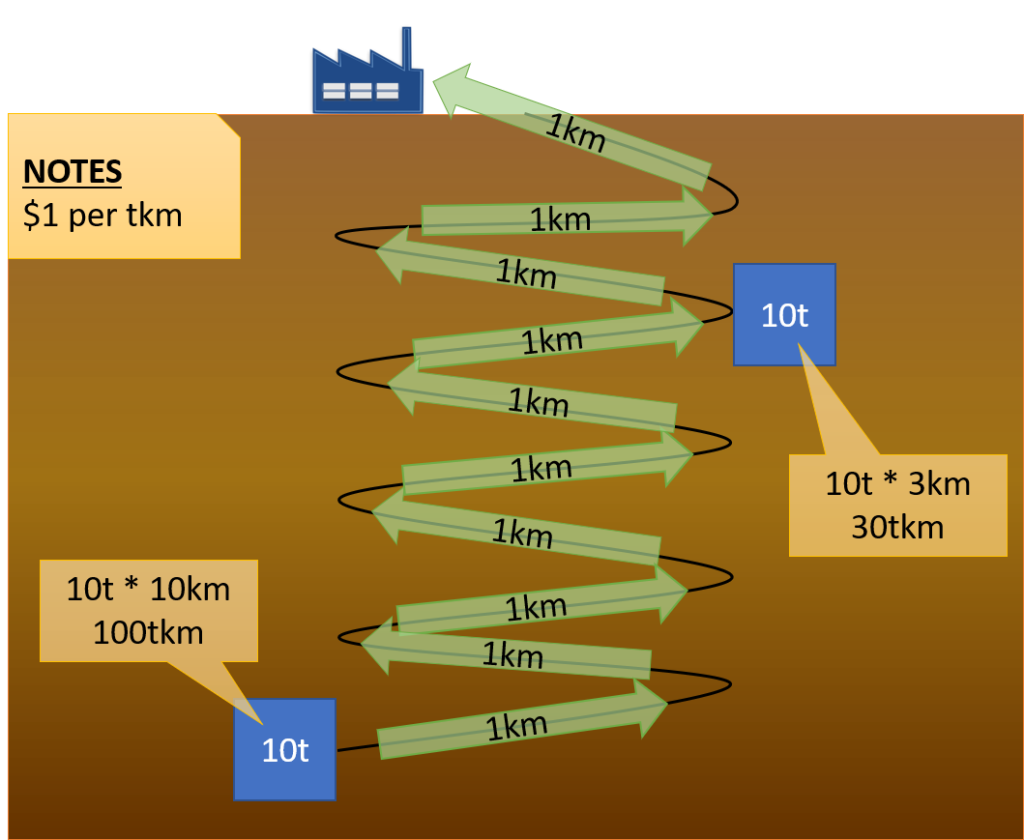
Example-A: With TKMs
Lets go back to Example-A and apply TKMs. The cost model assumes $1.00 for every TKM. The material in Zone-A has 10 tonnes and must be hauled 3 km to get to the mill, therefore the material in Zone-A has 30 TKMs. The material in Zone-A costs $30 to haul to the mill.
Zone-B also has 10 tonnes, but must travel 10 km. The material in Zone-B has 100 TKMs and therefore cost $100 to get to the mill.
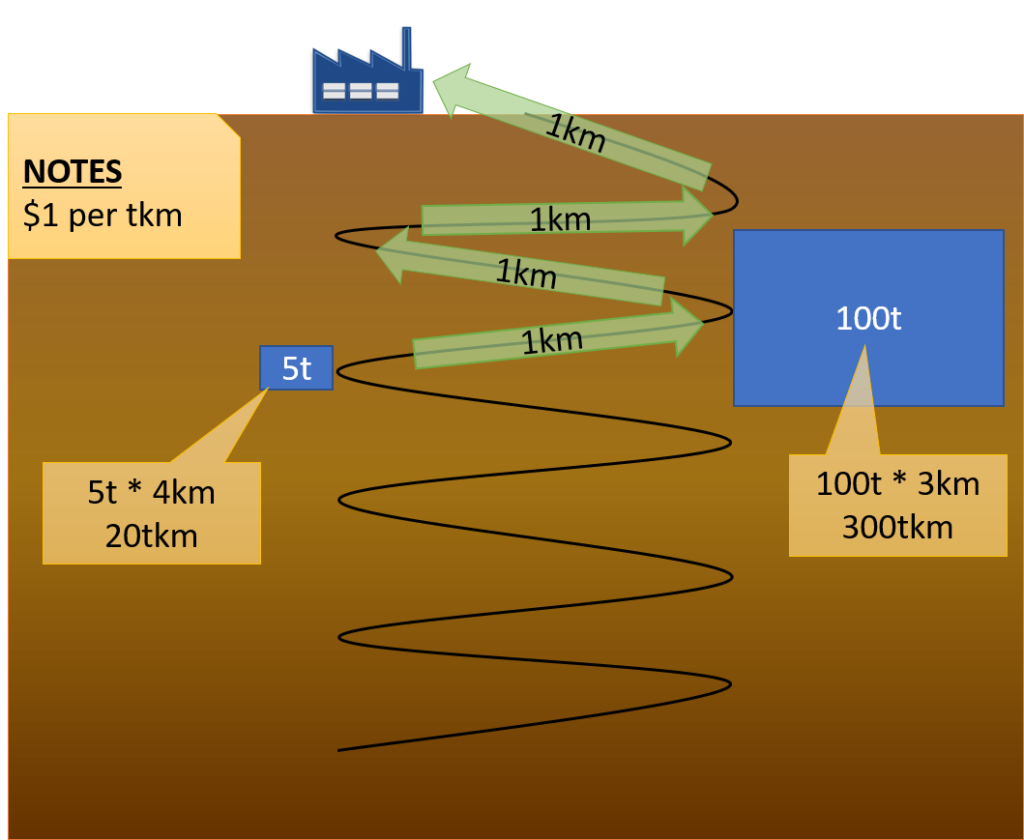
Example-B: With TKMs
Now lets look at Example-B and apply TKMs. The material in Zone-A has 100t and must be hauled 3 km. The material in Zone-A has 300 TKMs. It will cost $300 to haul the material from Zone-A to the mill. Zone-B only has 5 tonnes and must travel 4 km. The material in Zone-B has 20 TKMs and costs $20 to haul to the mill.
TKMs have significantly improved our cost model.
Step 1: Goldilocks Grouping

This is the most important step and requires the most brain cells. You need to look at your mine plan and break it into logical groups. Each group will get applied a distance. All the material in a group will get the same distance applied. You don’t want your groups too big because you will not get the resolution required to have a good model. You don’t want your groups too small because it will take you all year to setup the model. You want the group size just right. The grouping is the building blocks for the TKMs. Every mine is going to be different. Take a 5 minute break, go shoot the breeze with the nearest geologist, and then think about how to organize the mine into logical groups.
Example
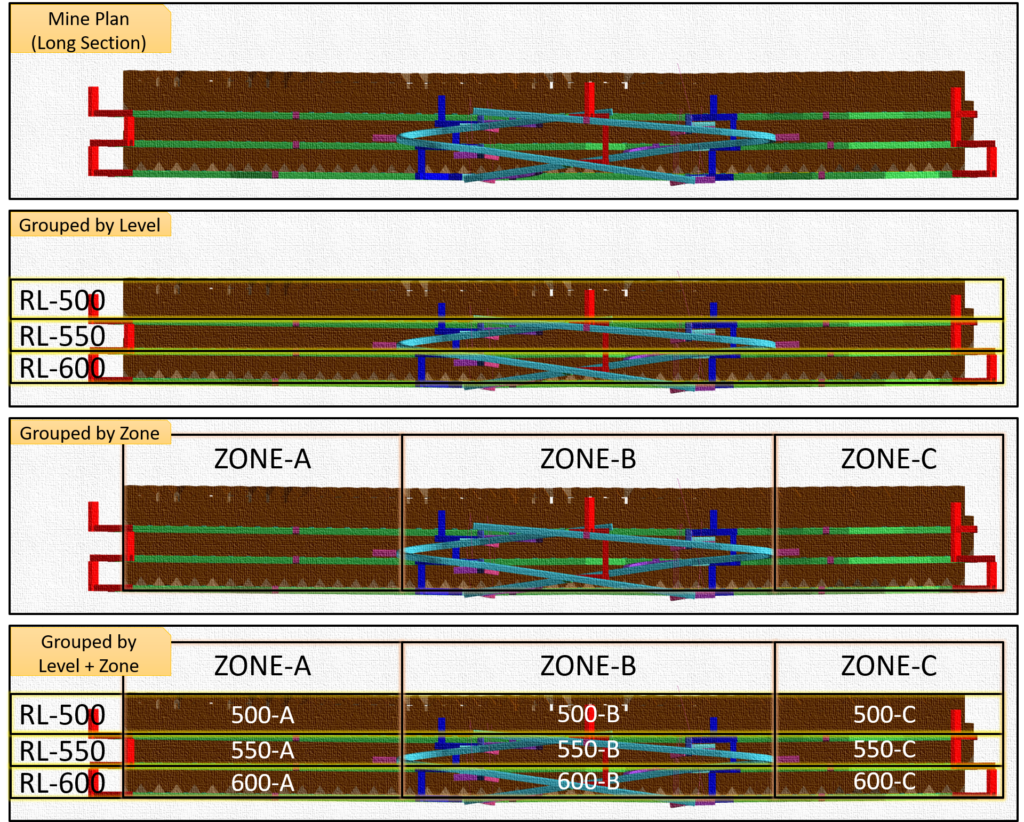
This example has 3 levels (500, 550, and 600). This example also has 3 zones (Zone-A, Zone-B, and Zone-C). In some mines the level may be the best answer for the grouping size. In other mines the level may not be the best answer. Every mine will be different. This example has combined the level and the zone to come up with a Level-Zone group.
Grouping for TKMs in Deswik
Deswik has several tools to group and name tasks. This video will cover creating a new custom attribute, applying a value to all tasks, and auditing the TKM grouping. There are several ways to skin a cat, and if you have a better way, then go for it.
Step 2: Measuring Distances
Measuring distances can take the most amount of time. The basics concept is measuring the distance from each group to the destination. You may have several destinations including a waste dump and a stockpile. Take your time and measure from the center of each group to each destination. You can use the center-lines to assist with the measuring. You may want to keep an excel sheet open to help with the process.
Measuring Distances in Deswik
Step 3: TKM Calculation
The TKM calculation is very simple and is shown below. The mass multiplied by the distance. If you are using metric units then it is tonnes multiplied by kilometers. If you are using imperial units then it is tons multiplied by miles and is called “ton-miles”.


Calculating TKMs in Deswik
Conclusion
TKMs can improve your cost model. I hope you found this tutorial helpful. If I missed something or you still need additional help, please contact me. I would love to help. Now go build a safe mine!